Orchard Tractor Width and Row Spacing: A Measurement Checklist for India
Aglist Editorial · Published 1 Oct 2026 · Last updated 21 Oct 2026
Measure the usable route, the complete tractor-and-implement envelope and the row-end turn before buying a narrow tractor. A practical worksheet with an explicit clearance example and configuration checks.
A tractor can be narrower than your row spacing and still be unsuitable for the orchard. Tree centres do not describe the opening left by trunks, branches, posts or irrigation equipment. Nor does tractor width describe the space occupied by a mounted sprayer during a turn. Before asking which narrow tractor to buy, prepare a measured route and an implement list that a dealer can assess.
This guide is a purchasing worksheet, not a safe-clearance standard or a substitute for the tractor and implement manuals. It focuses on access and manoeuvring; it does not claim that a particular horsepower fits a particular number of acres. The arithmetic example below is hypothetical, not a field test.
1. Map the whole journey, not one easy row
Start where the tractor will be parked. Follow the route through the shed opening, yard, gate, approach track, first turn and working rows. Continue to the far row end and the return route. A tractor that fits the straight rows may still fail at an angled entrance or a turn beside a boundary wall.
On a sketch, give each restriction a label: G1 for the entrance gate, R1 for the narrowest row and H1 for a difficult headland. Record obstacles separately rather than reducing everything to one average width. Include exposed irrigation valves, fixed trellis posts, leaning trunks and places where the usable path narrows around a bend. Note whether an obstruction is seasonal, such as foliage, or permanent.
For a vineyard or orchard, ask what changes between pruning, spraying and harvest. A route measured immediately after pruning may not represent the canopy later in the season. A dry access track also does not represent its condition after rain. Record those limitations on the sketch so that the purchase decision is not based on an unusually easy day.
2. Separate row spacing from clear corridor width
Row spacing normally describes a planting layout, often from row centre to row centre. Clear corridor width is the actual unobstructed opening through which the machine must work. Measure the latter at the restrictive points and heights relevant to the tractor and implement. A broad gap near the ground may narrow around the operator or a spray tank.
Keep dimensions in one unit, preferably millimetres, in your worksheet. Write down the location and what was measured: for example, between two fixed posts, not merely “row width”. Record the lowest relevant overhead obstruction separately. Treat power lines as a hazard requiring advice from the electricity utility; a tape-measure exercise is not a method for establishing electrical clearance.
Do not plan to remove guards or rollover protection to make a machine fit. The safe configuration and any manufacturer-approved procedures must be settled with the supplier. If the protected machine cannot use the route safely, reconsider the route or candidate machine rather than assuming the obstruction can be ignored.
3. Ask what the advertised width actually measures
Overall width, rear-wheel outside width and wheel tread are different measurements. Tread describes the distance between wheel centre lines; it is not the outside width of the tyres. A tyre or wheel-setting change can therefore invalidate a dimension copied from another configuration.
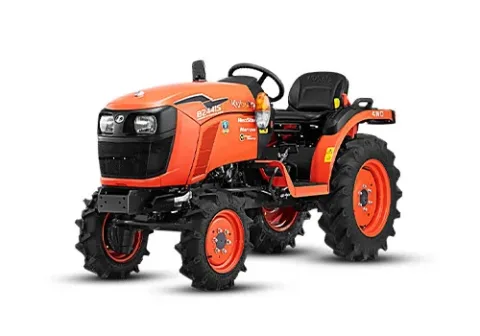
A current Indian example shows why the variant matters. Kubota's B2441S brochure lists two overall widths, 910 and 1,000 mm, in the Narrow column and different values in the standard column. Its Narrow product page promotes 910 mm rear width. Ask the dealer which setting is offered and measure the exact unit; do not combine a headline from one version with tyres from another.
Write the full model name, variant, front and rear tyre sizes, approved wheel setting and fitted accessories beside the measurement. Take the width of the widest relevant fixed part, not only the tyres. Have the supplier confirm that the proposed wheel setting is approved for the intended work. The narrowest available setting is not automatically the correct operating choice.
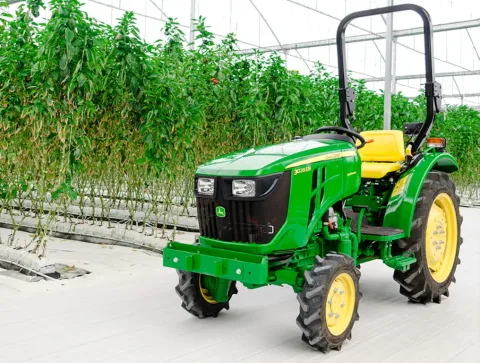
For candidate-specific questions, see our John Deere 3028EN 4WD buying checks and Kubota B2441S Narrow configuration guide. Use their specifications to prepare questions, then measure the complete configuration offered to you.
4. Measure the implement as well as the tractor
Make a separate line for every attachment you expect to use. For a rotavator, ask for the complete external width as well as its working width. For a sprayer, record the tank and frame envelope and any projections. For an offset attachment, record how far it extends on each side; a centred-width calculation can be misleading.
Also record overall combination length and rear overhang. Ask the supplier to check hitch compatibility, loaded weight, centre of gravity, PTO input and the approved ballast/transport setup. Access and lifting capacity are different tests: an attachment may fit the row but still be unsuitable for the tractor. Conversely, an approved attachment may be wider than the route.
Measure only with the equipment safely stopped and secured according to its manuals. Do not stand between a tractor and attachment while someone operates the linkage, and do not reach beneath unsupported raised equipment. A dealer should manage any changes between working and transport configuration.
5. Use clearance arithmetic only as a screening tool
Suppose a hypothetical straight corridor has 1,800 mm of clear width and the widest part of a centred tractor-and-implement combination measures 1,360 mm. The total static space left is 1,800 minus 1,360, or 440 mm. If the combination is exactly centred, that is 220 mm on each side.
This calculation does not establish a safe operating margin. It excludes steering corrections, implement movement, uneven ground, leaning vegetation and any offset. If an attachment extends farther to one side, measure each side separately. If the route bends, the straight-line calculation cannot describe the swept path through the bend.
Use the result to identify what requires closer assessment, not to approve a purchase. Ask the supplier to state the required operating clearance for the actual combination and conditions. Where the available space is marginal, a different approved attachment or access arrangement may be more sensible than buying on the strength of a single brochure dimension.
6. Treat the headland as a turning problem
A published turning radius may have conditions such as “with brake”. It may describe the tractor rather than the complete combination. Kubota's cited B2441S brochure, for example, qualifies its 2.1 m minimum turning radius with brake. Doubling that number is not a reliable calculation of the headland needed for an attached machine.
The rear of a long mounted implement can swing outside the tractor's path. The gate approach angle, a ditch edge and a boundary wall can all make an otherwise generous area unusable. Ask for a controlled demonstration of the intended sequence: enter, align with the row, work, exit and turn into the next planned pass. A demonstration of the bare tractor making circles does not answer that sequence.
Keep observers out of the operating area. Do not use a person beside a moving tyre or implement as a clearance marker. The operator and dealer should agree a safe plan, with a stop and reassessment whenever clearance or visibility is uncertain. Do not improvise a tight manoeuvre beside a drop or on a slope just to complete the demonstration.
7. Take this worksheet to the dealer
Use one sheet per candidate configuration and retain the same route labels for each comparison:
- Farm route: gate, narrowest row, overhead restrictions, approach bends and usable headland.
- Seasonal conditions: canopy stage, likely wet areas and any part of the route not assessed.
- Tractor identity: full model and variant, tyre sizes, approved wheel setting and protective equipment.
- Measured envelope: widest point, relevant height, length and wheel setting used for each figure.
- Implements: exact model, external and working width, side offset, rear overhang and loaded configuration.
- Compatibility confirmation: hitch, PTO, hydraulic connections, approved ballast and transport position.
- Demonstration result: which route and implement were tested, what remained untested and what must change before acceptance.
- Written offer: configuration, included attachments and services, with ex-showroom price and applicable on-road charges separately identified in rupees.
Do not accept a verbal “it fits all orchards” as a substitute for these entries. If the demonstration uses different tyres or an empty sprayer, record that difference. Your acceptance conditions should describe the combination being purchased, not a more convenient substitute brought for display.
Make the decision from the limiting job
A sensible shortlist starts with the hardest necessary access point and the actual attachment. Eliminate combinations that cannot meet those requirements safely, then compare operator comfort, service access and ownership costs among the remaining candidates. More engine power cannot repair a physical mismatch, and smaller width cannot prove that an implement is compatible.
This approach also avoids buying two machines' specifications as if they were one: a narrow variant's width, a standard variant's tyres and another model's hydraulic rating do not form a real tractor. Keep one documented configuration throughout the quote, demonstration and delivery inspection.
Sources and scope
Manufacturer information checked on 1 October 2026: Kubota B2441S standard/Narrow brochure and Indian Narrow model page. General machinery-safety principles are supported by HSE: Using tractors safely; this is technical guidance, not a statement of Indian law. The route worksheet and hypothetical arithmetic are original buying guidance, not measured performance data.